Some soils need some type of remediation or amendment before successful planting can take place. Depending on the damage done to the soil, some deficiencies can be amended with wildflowers!
Nitrogen is the most common nutrient that limits the growth and success of plants in terrestrial ecosystems. Soils that are depleted of nitrogen and other minerals can be remediated by certain plants that will help restore the nutrients back into your soil. We have a special seed collection available just for this purpose called Soil Amendment Wildflower Collection. In this collection you will receive five varieties of wildflowers that help restore the nitrogen and other minerals back into your soil.
Most of the plants are members of the legume family. This family of plants have nitrogen fixing bacteria naturally associated with their roots that can take atmospheric nitrogen and transform it into nitrogen compounds in the soil that plants are able to access. This process is called nitrogen fixation and is a key process in the nitrogen cycle.
Nitrogen Fixation Explained
Nitrogen fixation is essential to life because fixed inorganic nitrogen compounds (like those found in the atmosphere) are required for the biosynthesis of all nitrogen-containing organic compounds (which are accessible for plants).
Nitrogen fixation is carried out naturally in soil by microorganisms termed diazotrophs (bacteria that can perform the fixation of gaseous nitrogen in the atmosphere into compounds like ammonia). Some of these bacteria capable of capturing atmospheric nitrogen have formed symbiotic relationships with plant groups including legumes. If you dig up an established plant in the legume family, you can often see round nodules attached to the roots - this is where the rhizobia bacteria are working their magic. The organic nitrogen compounds are then stored in the roots of the legume plant and are released into the soil for neighbouring plants to access when it decomposes.
Interestingly, nitrogen fixation also occurs between some termites and fungi. The Nitrogen Cycle is quite complex, but this diagram simplifies it for our purposes as gardeners.

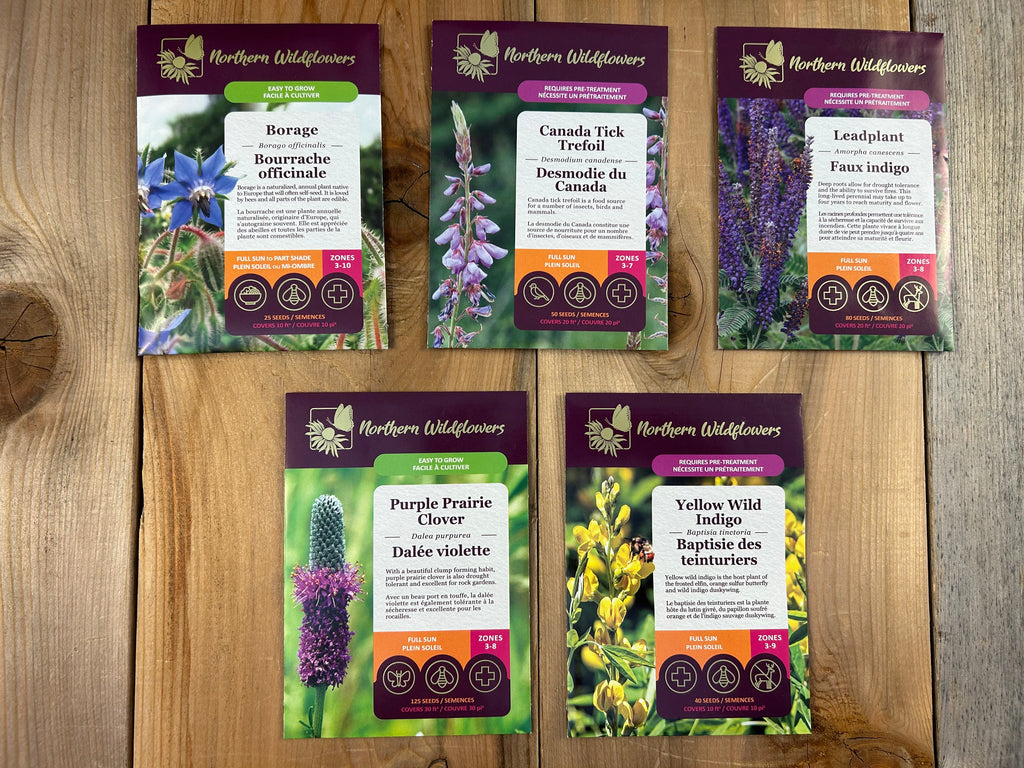
Our Soil Amending Wildflower Collection
Canada Tick Trefoil

Canada Tick Trefoil is part of the legume family. It grows best in full sun to partial shade, in a moist to medium area.
Leadplant

A member of the legume family native to the central parts of Canada and the U.S. It is tolerant to a range of soil types and is happiest in full sun. Deep roots allow for drought tolerance and the ability to survive fires - this plant is resilient and soil healing.
Purple Prairie Clover

The plant is very easy to grow, drought tolerant and grows well in a variety of soil conditions including rock gardens. Also a member of the legume family, Purple Prairie Clover fixes nitrogen, enhancing the soil for other neighbouring plants.
Yellow Wild Indigo

Yellow Wild Indigo is a legume that is of high value to pollinators and is the host plant of the Frosted Elfin, Orange Sulfur Butterfly and Wild Indigo Duskywing.
Borage

Borage adds trace minerals to the soil it is planted in such as calcium and potassium. A consequence of adding these trace minerals back into the soil is that it will help near by plants with their resistance to disease and critical damage by pests. Plant borage next to tomatoes and strawberries to watch them flourish while also deterring hornworms and cabbage moths.
Its striking blue star shaped flowers are attractive to bees and will attract pollinators to your garden. Borage can also be used as green manure, its roots grow deep to aerate the soil as well as releasing trace elements, and after the plant is cut down and mulched it will release nitrogen back into the soil.
*Borage is not native to North America, but is now naturalized.
More Soil Healing Wildflowers
There are a couple of honourable mentions that are not included in our Soil Amendment Wildflower Collection that also work magic deep in the soil by removing contaminants.
Dense Blazingstar

This stunning, tall wildflower is able to grow in soil that is contaminated with cadmium by turning this toxic heavy metal into a non-toxic form in its tissues.
This makes it an effective plant for remediation of sites that have been contaminated. Since cadmium in the soil can bioaccumulate in food crops, this beautiful wildflower may offer a very important solution to reduce the presence of this toxin in our food.
Maximilian's Sunflower

Sunflowers (Helianthus) are known for their phytoremediation properties. They help clean soil that has been contaminated with hazardous metals or radiation, by absorbing these contaminants through their roots and storing them above ground in their plant tissues. Maximilian's Sunflower is native to most provinces in Canada and is a great alternative to using common garden sunflowers for restoring soil health.
They can be helpful in ecological restoration projects where chemical or industrial contamination has occurred. However since they hold most of the contaminants and heavy metals they pull from the soil in their stems and leaves, the plants need to be cut and removed afterwards if the intention is to remove the contaminants from the site.
]]>